Welcome to BLISS!
What's that?
Blossom Lane Institute of Spunky Sparkle.
Really.
That's what we decided to name our home school this year. She came up with the spunky sparkle part, because she's all about that. And I love the acronyms. I couldn't resist this one. It sums up what I want our school to be, which is anything but dull and pointless. We're happy to be together.
Every morning we point to the glittery BLISS letters on our school supply bins and chant: "Blossom Lane Institute of Spunky Sparkle!" Then we give a high five and say, "Welcome to BLISS!"
That's how we start our day. It's the best. And if we hit a little rough spot and get cranky, we go back to our happy chant and start over again.
~*~*~
This year, as with the last two, I only have my youngest daughter home for school. It's been so much less complicated teaching just one than several at a time. She's in 5th grade, so I just love getting to dig in deeper with her.
She will probably go to public school next year. So that means I need to make sure she's up to speed on all of her basic skills, as well as teach her whatever content I want to make sure she gets before I send her off to middle school.
Here's our plan...
For math, we do flash card and oral drill to keep her multiplication facts fluent. She's finishing up a basic math workbook from last year, and then we'll move on to Spectrum 5th Grade math. She does Sum Dog and other math game web sites on-line.
For language arts, she has a Spectrum 5th grade Reading comprehension workbook, a Grammar Minutes workbook left over from last year, the Writer's Express text that I used with some of her older siblings, and a writing prompts journal. I have other resources available for later in the year, but this is enough for now. She's doing creative writing on her own a few times a week on the computer. Plus, she chooses a novel to read on her own for literature. Right now it's Mr. Popper's Penguins.

I keep her daily books and flash cards in a basket on the floor so I can reach in easily and hand her the next one when we're working together in the morning. I marked the top of each one with the subject so I can find them easily from the top at a glance. I also have a larger basket with other resources we don't use daily but want to have handy.


The real fun for me is social studies. This year we'll be in a world geography co-op on Mondays where she will learn about culture and mapping. There isn't any homework (yay!) so the other four days we get to do our own thing. Last year my goal was to cover world history from the earliest civilizations up through the Middle Ages. We didn't finish the Middle Ages, so I decided to pick up with that again and go as long as we want. Then we'll move on to the Renaissance and Reformation era, which I'm guessing will take us up to Christmas or even beyond. I want to take the scenic route through this period of history since there is so much to learn. We love art and music, and I have a bunch of great children's biographies and historical fiction with important concepts! The public schools do world history in 6th grade, so I'm not worried if we miss some of the later time periods. However far we get, I'll at least leap frog forward to World War 2 and Holocaust studies at the end of the year.
One of the key resources we are using right now is What Really Happened in the Middle Ages, a collection of short biographies compiled by Terri Johnson. So far we have read chapters about Theodora and Alcuin.


So far with both of those books, I have started a spiral notebook for copy work. I jot down several phrases or sentences with key facts for each story and she copies them either while I read to her or later on. I encourage her to use her best handwriting, and pay attention to spelling and punctuation. She also does oral narrations of whatever we read, telling me what she remembers from the story. These are Charlotte Mason approach methods.
Here is a sampling of some other books we'll be using for the Middle Ages and then the Renaissance and Reformation era.


Our whiteboard easel always comes in handy for science.

We also had a membership at the Orlando Science Center, which just expired, but we managed to pack in four visits in the first few weeks of school, once with two of my grandchildren.

My daughter is an enthusiastic artist. Her favorite YouTube channel is Art for Kids Hub which features drawing videos. She has hundreds of drawings in her portfolio. We organized all of her art supplies into a rolling cart which she stores in her bedroom closet. I think she spent far more on art supplies as the school year started than we did on other school materials. She has dabbled in acrylic paints. We'll do more tie dye this year, and we're both going to learn how to use a wood burning tool. She's already a pro with a hot glue gun.

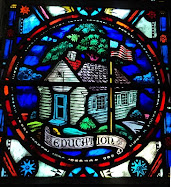
Like me, she is also an art museum fanatic. We have visited six of the local museums, some of them more than once. Last week, we took a spontaneous trip to one of our favorites, the Morse Museum of American Art, which claims the largest collection of stained glass work from the studio of Louis Comfort Tiffany and his colleagues.

One craft project that we did is making calming glitter jars. That's definitely a lot of spunky sparkle!

She also loves to cook, so she's done several kitchen projects like pancakes, eggs, cookies, smoothies, and other yummy treats. Of course I'm glad she gets extra hands on practice with planning, reading instructions, measuring, food safety, and other practical skills.

So that's what we've got going so far!
Related posts:
- Our Seaside School Room
- Fourth Grade Home School and Lots of Links
- Eclectic Home Schooling: Gathering Up Bits of the World
- What is the Charlotte Mason Approach to Education?
God bless!